
Setting up Windows Screen Readers on a Mac
Posted:
I recently picked up a Mac mini for personal projects and went through the usual process of setting up my development and testing tools. Like most accessibility specialists, I regularly work with multiple screen readers. Macs come with VoiceOver built in, but getting JAWS and NVDA running on a Mac takes a few extra steps.
Why test in multiple screen readers
When testing, experimenting, and building UI components for the web, I test in JAWS, NVDA, macOS VoiceOver and iOS VoiceOver, unless it's something tried and tested, in which case I'll give it a quick pass with VoiceOver.
The latest WebAIM survey shows the top 3 most commonly used screen readers are:
- NVDA (NonVisual Desktop Access). Windows-only. Free
- JAWS (Job Access With Speech). Windows-only. Paid
- VoiceOver. Included with macOS and iOS.
While the basic experience is similar, each screen reader announces things slightly differently, has different browser and ARIA support, and like any software, can have bugs and quirks. Testing in multiple screen readers helps build up a more complete picture of the screen reader experience. Sometimes, with more complex UI components, you can encounter issues specific to a certain screen reader.
Setting up a Windows Virtual Machine
Since neither JAWS nor NVDA supports macOS, we need to set up a Windows virtual machine. In the past, I've used VirtualBox, but since moving to an Apple Silicon Mac, I've found that UTM performs better and has been easier to work with. I had performance issues running Windows in VirtualBox, which meant the audio would cut out, not great when you’re relying on speech output.
Download Windows 11
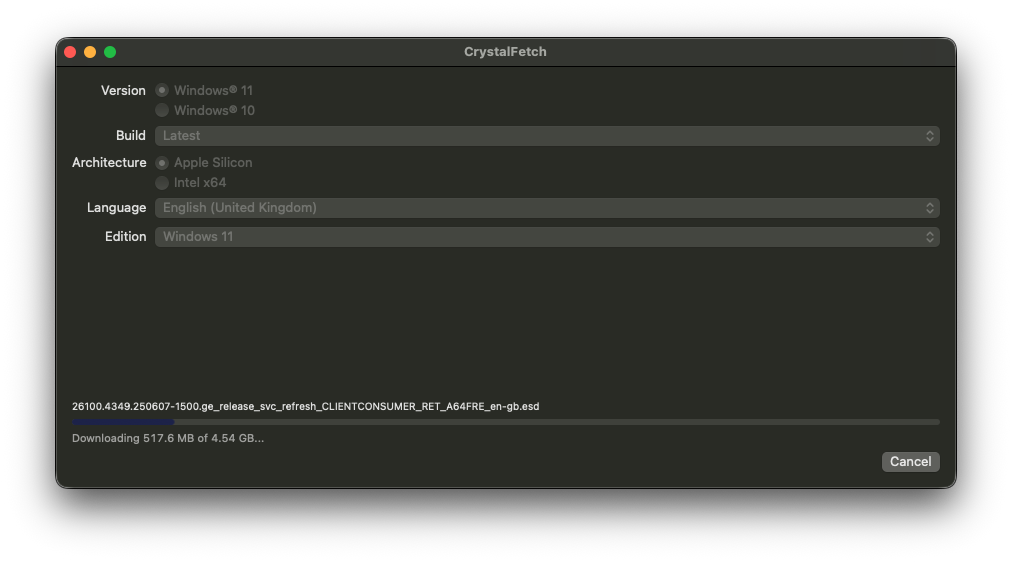
First, we need to grab Windows 11. I prefer to use CrystalFetch (opens App Store), a free macOS app that makes legally downloading the latest Windows builds really easy.
Open CrystalFetch and:
- Select Windows 11.
- Select latest under build.
- Click Download.
Alternatively, you can download directly from Microsoft.
Buy a Windows 11 licence key
I bought a licence key from Product Codes. At the time of writing, a Windows 11 Pro licence key was £9.90.
Set up UTM and install Windows
Download and install UTM.
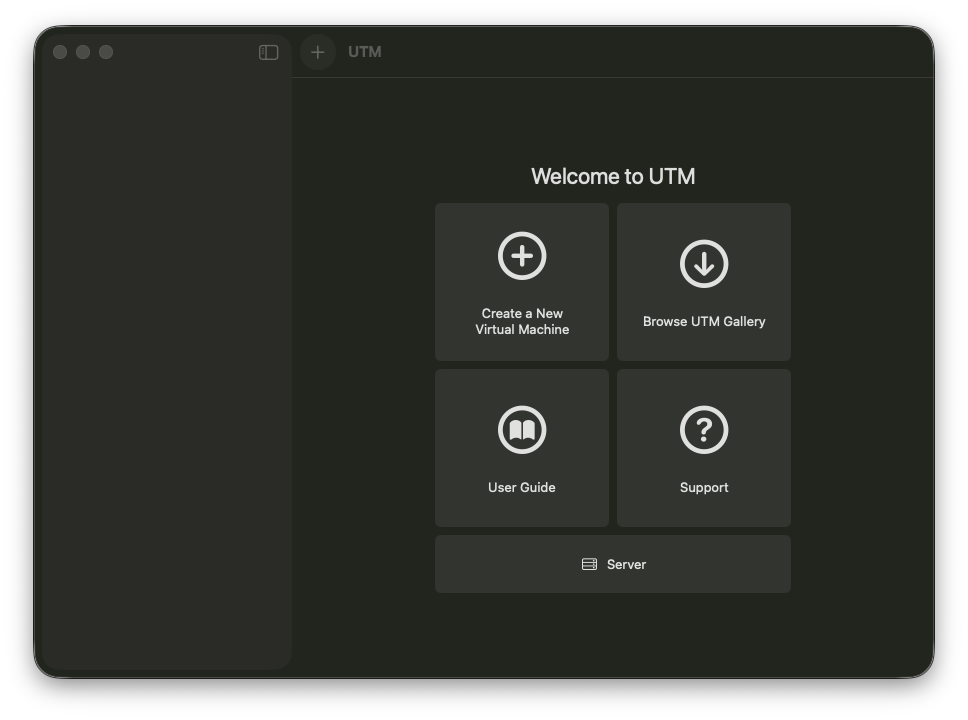
Once installed:
- Click "+ Create a New Virtual Machine".
- Click Virtualize.
- Click Windows.
- Select the memory and CPU cores you'd like to use. I used the minimum spec for Windows 11 Pro - 4GB of memory and 2 CPU cores.
- Select the ISO we downloaded with Crystal Fetch, then tick "Install Windows 10 or higher" and "Install drivers and SPICE tools" checkboxes.
- Enter the size of the virtual hard drive for the VM. I went with the minimum required 64GB.
- Click save and let UTM finish setting up the VM.
- When the VM launches, press any key to start the Windows installer when you see the "press any key to boot from disk".
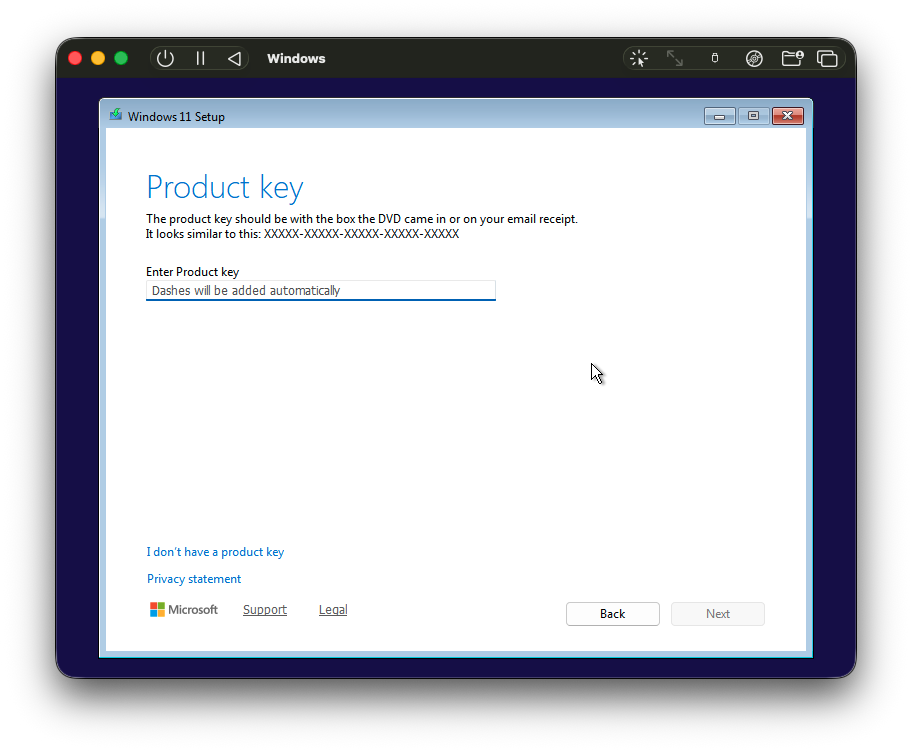
You should then be taken through the Windows installer, where you can enter the product key you bought earlier.
Once Windows has finished installing, updating and restarting, we can start downloading our browsers and screen readers.
If you hit any issues, check out the Windows set up guide on the UTM site.
Install NVDA
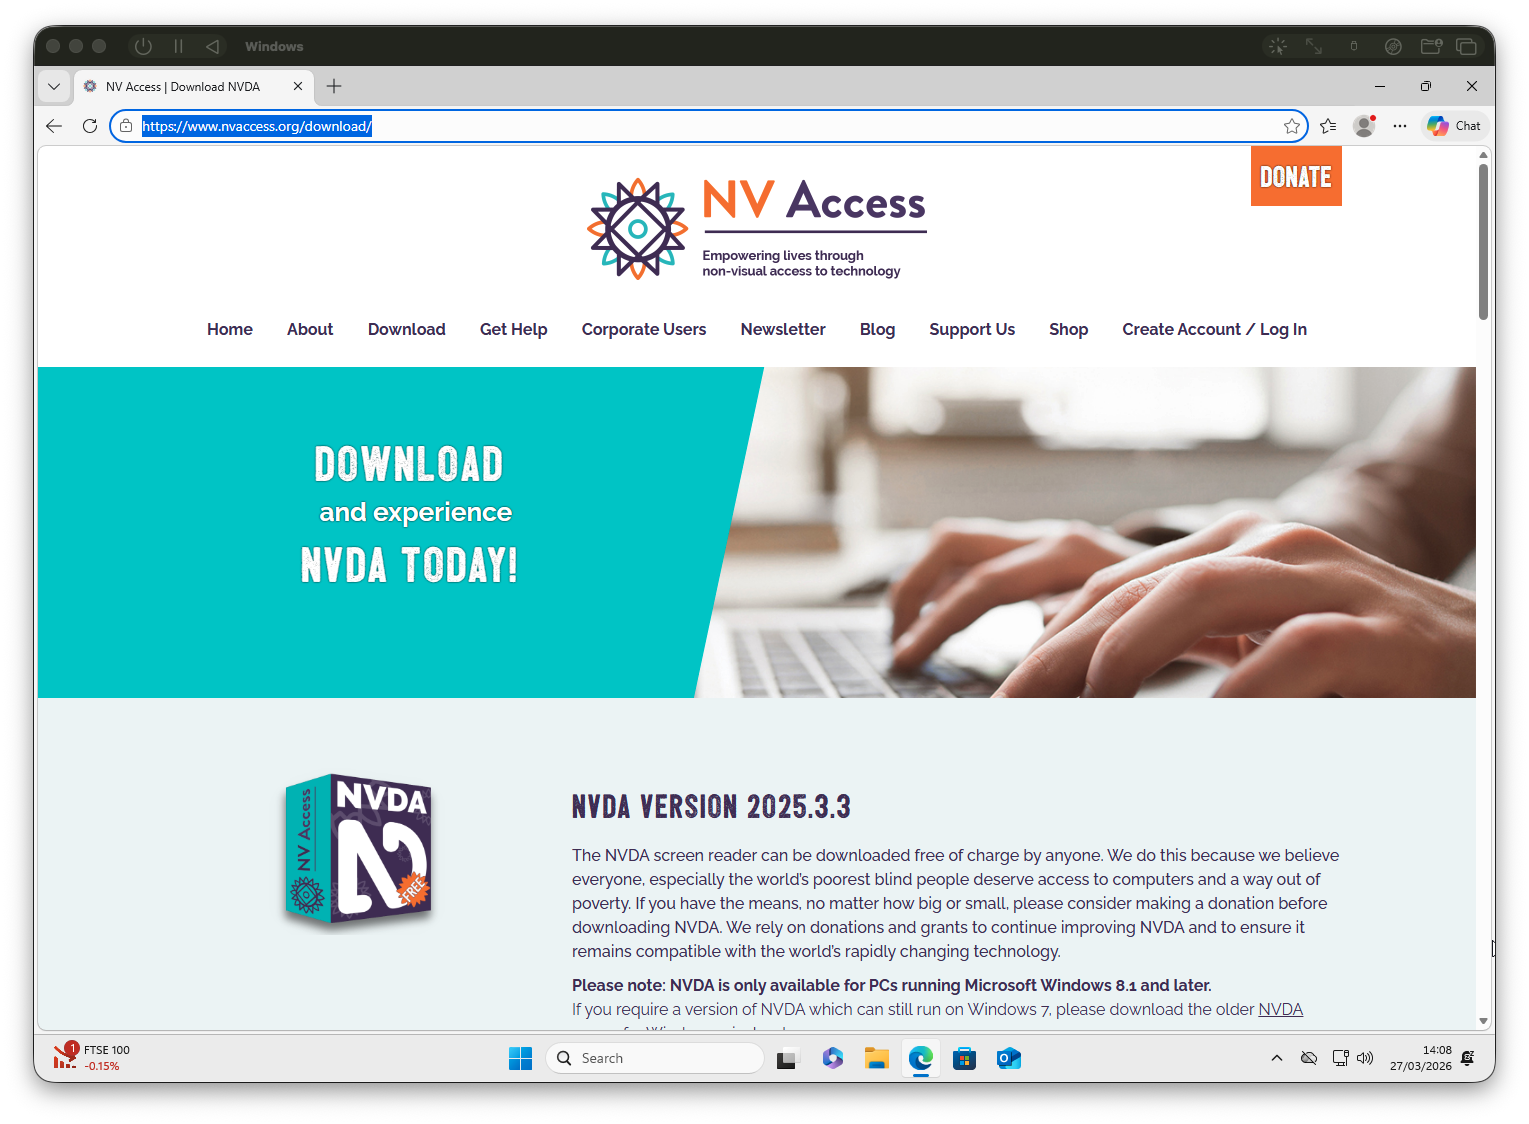
Download NVDA within the newly created VM. Although it's free, I'd recommend making a donation to support the software and future development.
Once installed, there are two settings worth enabling.
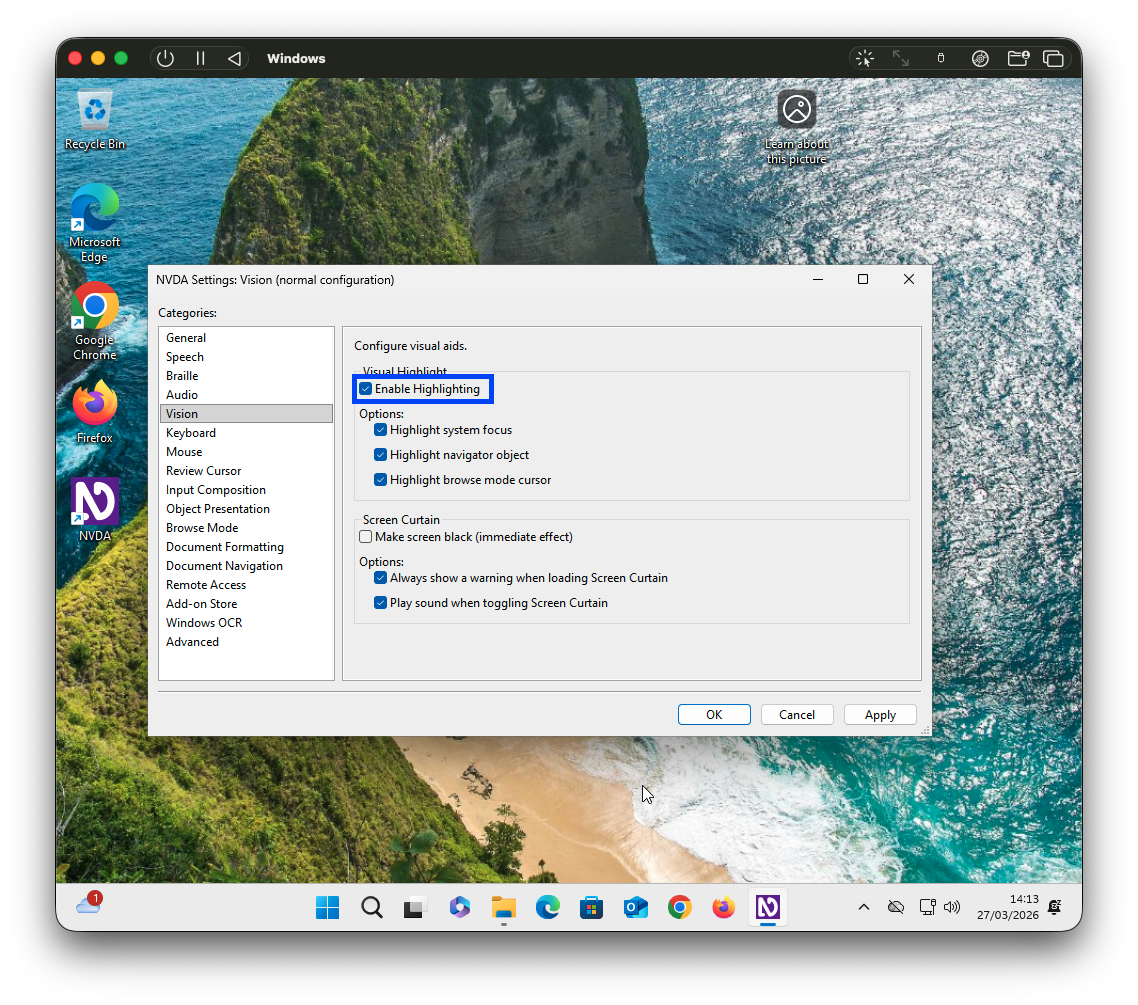
Visual Highlight
This makes it easy to see the element NVDA is currently focused on and announcing as you navigate through the page. It’s slightly different from standard focus indicators provided by the site/browser, as it will also be shown on any non-interactive element, such as text that’s being read out.
- Start NVDA.
- Right-click the NVDA icon in the system tray.
- Click Preferences, then Settings.
- Within the Settings dialog, click Vision.
- Click Enable Highlighting, under Visual Highlight.
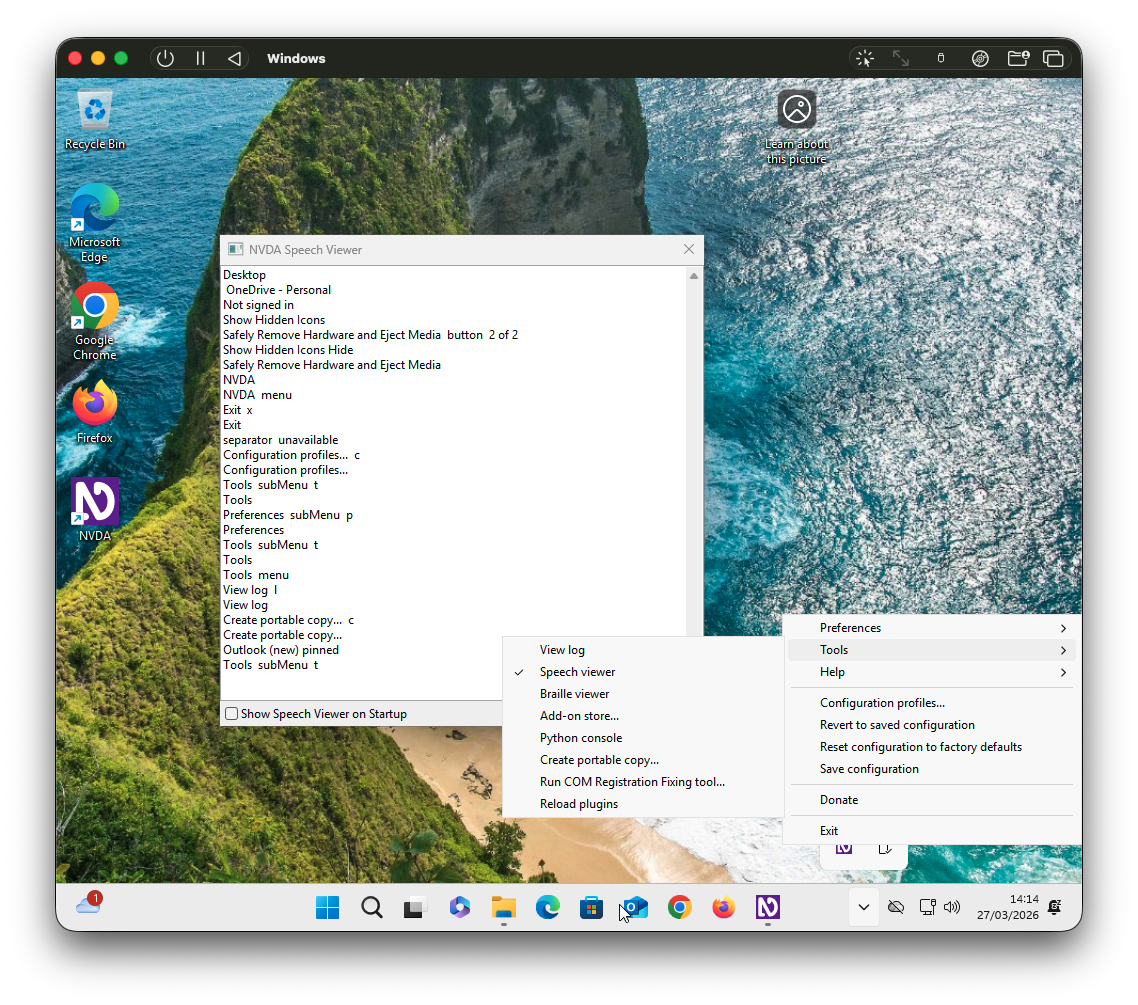
Speech Viewer
Speech viewer displays a text log of the NVDA spoken output. It's useful, but bear in mind that the speech viewer doesn't always match exactly what NVDA has spoken, so it shouldn't be used as a replacement for listening to the spoken output.
- Start NVDA.
- Right-click the NVDA icon in the system tray.
- Click Tools, then Speech Viewer.
- The Speech Viewer will then open.
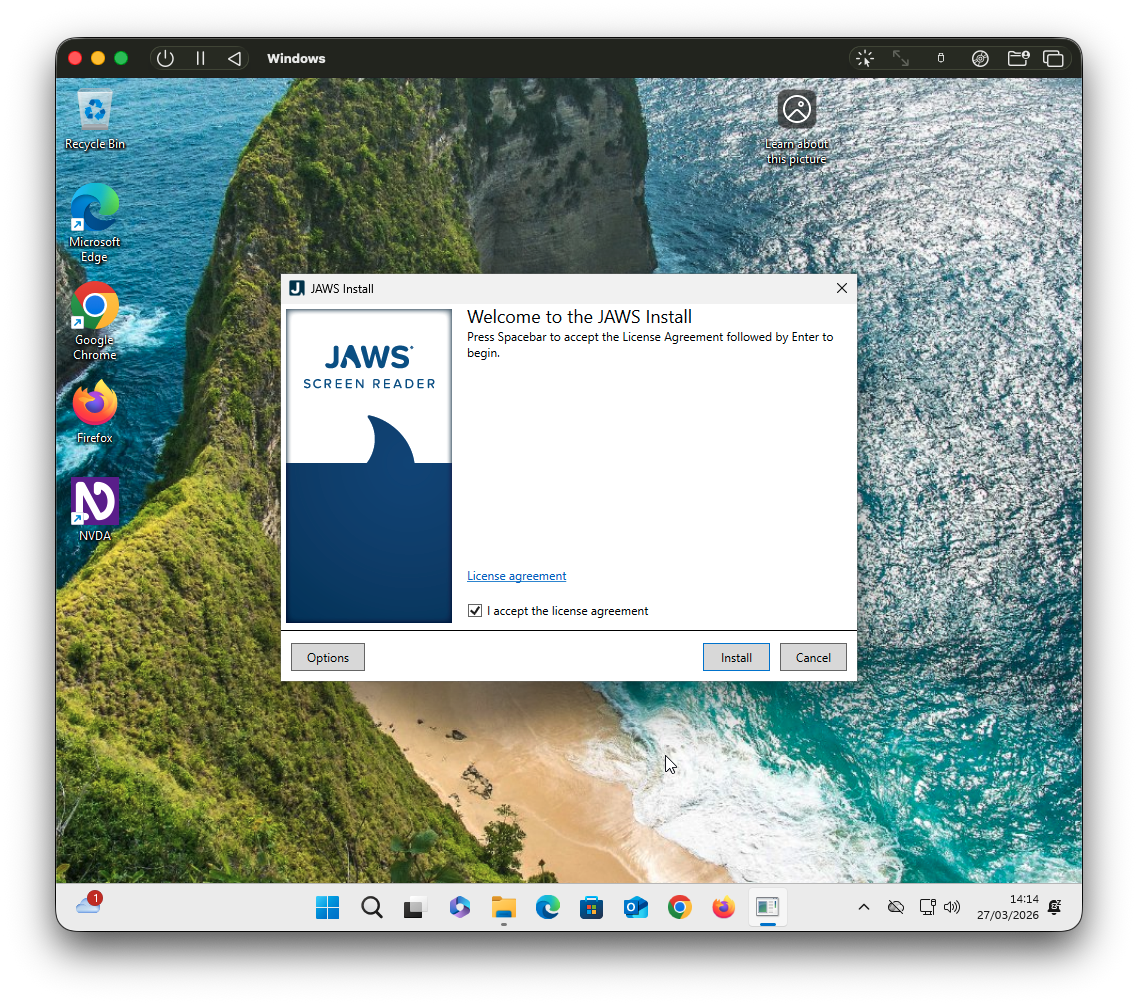
Install JAWS
Download JAWS within the VM.
JAWS is a paid product, with prices ranging from the hundreds to the thousands, depending on the licence. It does, however, offer a 40 minute demo mode for evaluation. Keep in mind that the End User License Agreement prohibits using the 40-minute demo mode for accessibility testing.
Like NVDA, JAWS also contains a couple of useful features worth knowing about.
Speech History
Similar to NVDA Speech Viewer, JAWS contains a Speech History feature that shows the last 500 lines of speech. You can open the Speech History dialog by pressing Insert + Spacebar + H.
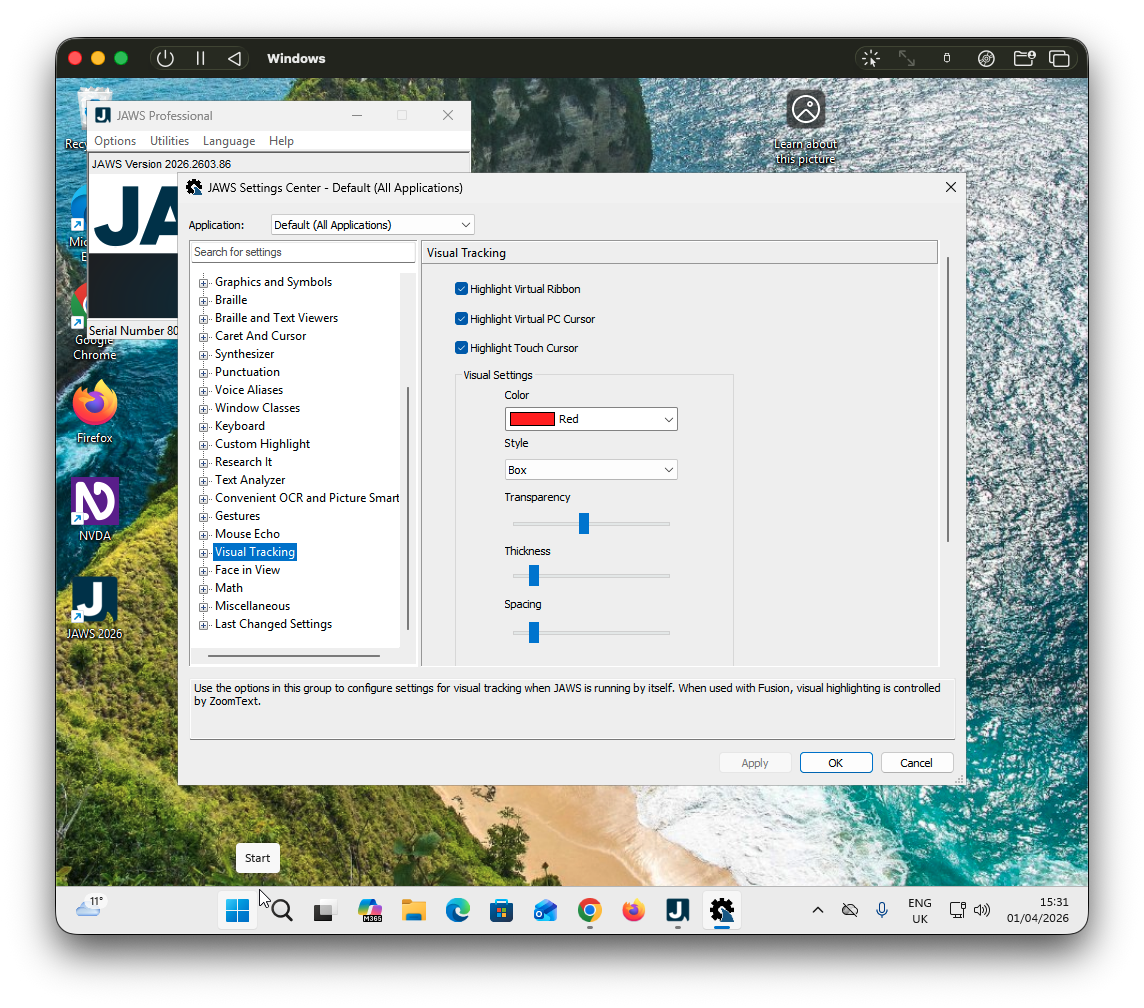
Highlight Virtual PC Cursor
JAWS also contains a visual highlight for tracking the position of the JAWS cursor. In JAWS 2026 it's enabled by default. You can find the setting and related options for changing the appearance of the highlight by:
- From the JAWS dialog, click Utilities, then Settings Center.
- In the settings center, in the left-hand tree view, click Visual Tracking.
- Enable "Highlight Virtual PC Cursor". You can modify the appearance of the highlight here too.
Configure the keyboard
By default, both JAWS and NVDA use the Insert key for certain commands, which isn't present on Apple keyboards. There's a couple of options to work around this.
Option 1: external PC keyboard
The easiest option is to plug in a full sized PC keyboard, though if you're working from a laptop and move around a lot, it's not ideal.
Option 2: remap insert key
There are a number of apps that let you remap keys. Not all will work with UTM due to how it receives keyboard input from the host machine. Mac apps like Karabiner-Elements, though often recommended, will not work with UTM. After trying tools like PowerToys and AutoHotKey, I found SharpKeys, which is free and straightforward to set up.
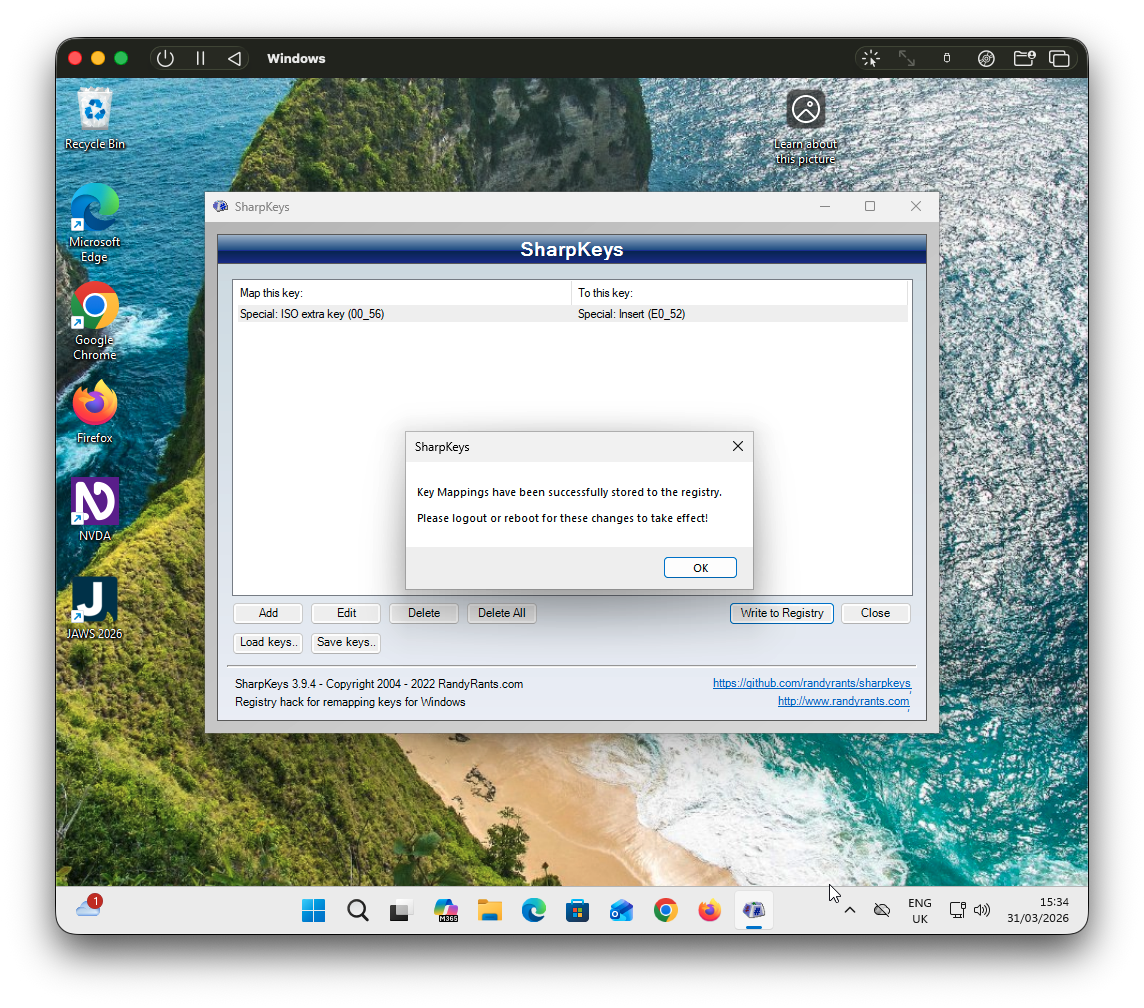
Within the VM:
- Download and open SharpKeys.
- Click Add, then under "Map this key", select the key you want to trigger Insert (make sure you pick a rarely used key).
- Then, under "To this key", select Insert and map it to the Insert key.
- Click Write to Registry.
- Restart the VM.
- You can now use your chosen key as Insert .
Avoid using Caps Lock
Both JAWS and NVDA have the option to use Caps Lock as a modifier key in addition to Insert. I'd avoid that, as caps lock behaves slightly differently on Apple keyboards and may not pass through to the VM as expected.
Selecting the keyboard layout
Both JAWS and NVDA use slightly different keyboard commands depending on whether you're using a desktop or laptop keyboard. Make sure you have the appropriate keyboard layout selected. For most Apple keyboards you want to use Laptop.
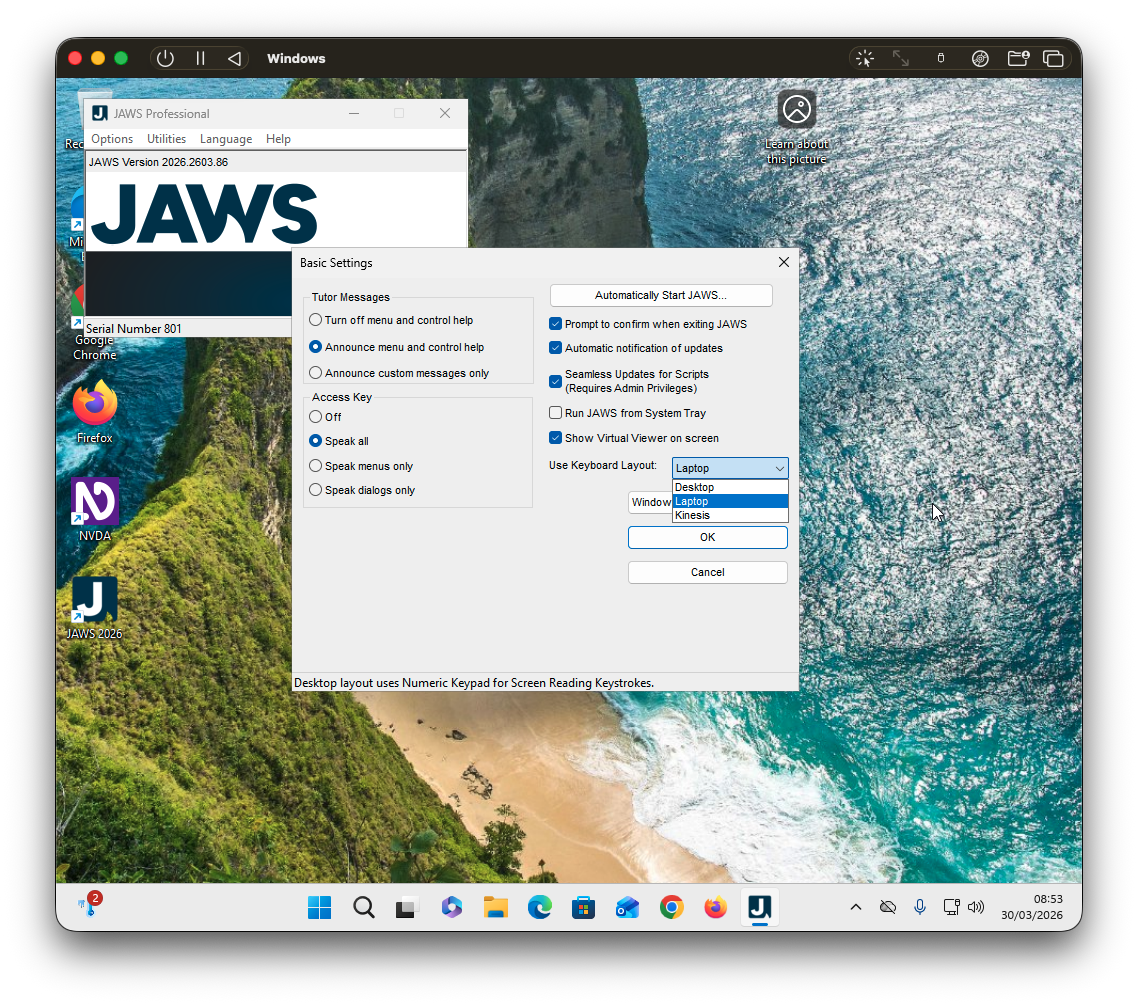
JAWS keyboard layout
- Start JAWS.
- Click Options, Basics.
- Under Use Keyboard Layout, select Laptop.
- Click OK to save.
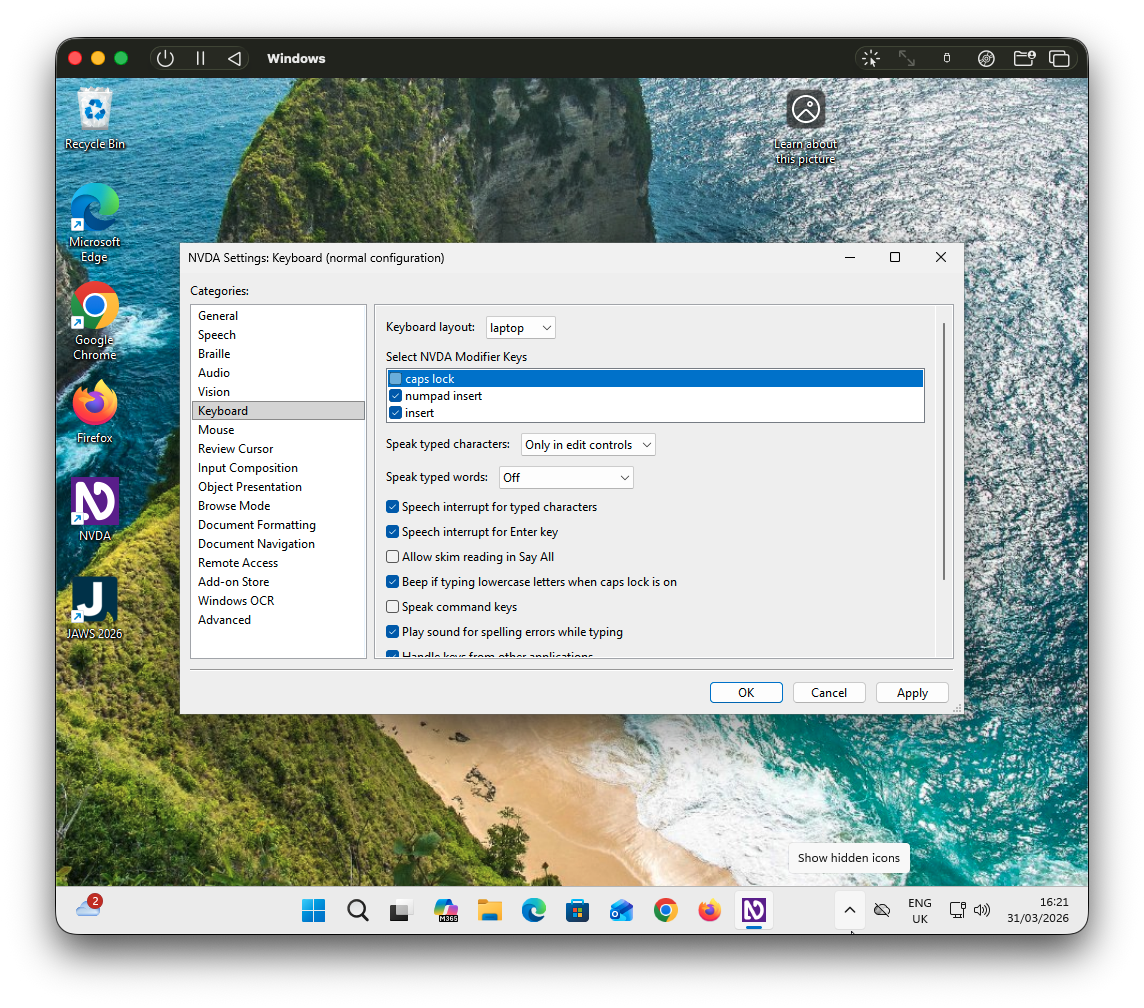
NVDA keyboard layout
- Start NVDA.
- Right-click the NVDA icon in the system tray.
- Click Preferences, then Settings.
- Under keyboard, change Keyboard layout to Laptop.
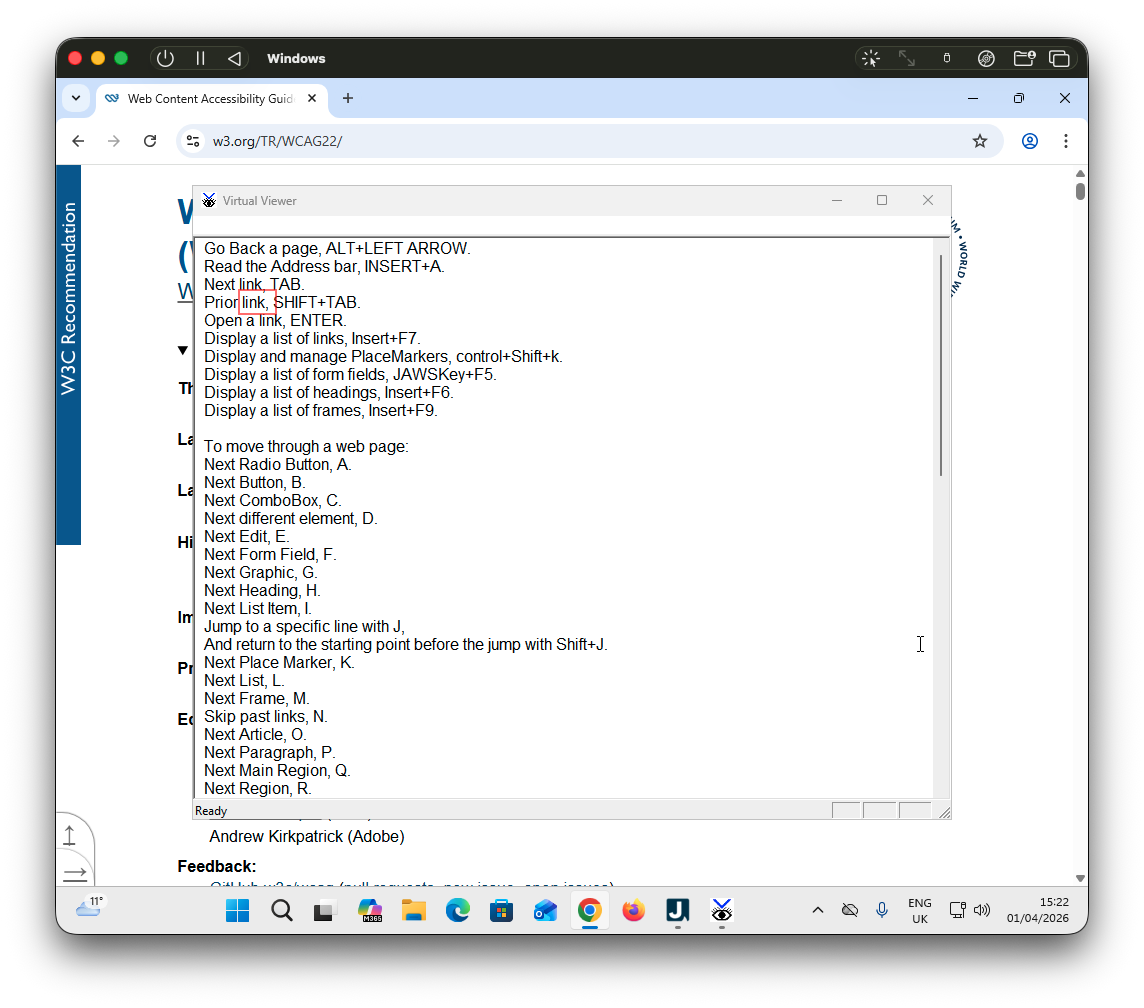
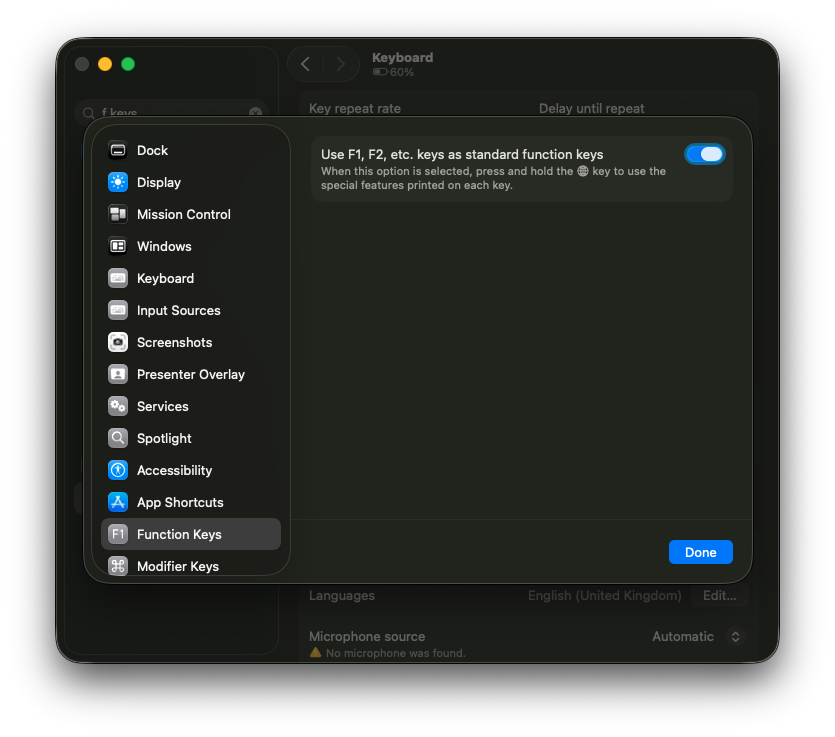
Using Function (F) keys
Certain NVDA and JAWS commands require the use of a function key. Because Apple keyboards use function keys for things like screen brightness, you'll need to press fn + the relevant function key to trigger the command in the VM.
So for NVDA commands like Insert + F7, you'll need to press Insert + fn + F7 on your Apple keyboard.
Alternatively, you can set F keys to function as standard function keys in macOS settings, which will pass through to your VM
Browser and screen reader combinations
Screen readers work better when paired with a supported browser. While screen reader support for different browsers has improved over the past few years, I'd recommend the following pairings when testing:
- JAWS + Chrome or Edge.
- NVDA + Chrome or Firefox.
- VoiceOver + Safari.
These also match the most common screen reader browser pairings from the latest WebAIM Screen Reader Survey.
Set up complete
Once everything is set up, switching between macOS VoiceOver and Windows screen readers is just a case of firing up your new VM. You can now cover most real-world combinations without leaving your Mac.